 EN
EN FR
FRHello !
I am writing this article for those looking for a way to automate your garage door/roller shutters with Home Assistant support.
When we decided to automate the roller shutters in our event hall and integrate them with Home Assistant (We use roller shutters from GRIFCO), I searched for suitable gateways that could be integrated with Home Assistant.
Sadly, the most popular and widely used option, MyQ, owned by Chamberlain, has closed the door to their API, thereby ending support for third-party software tools like Home Assistant. This sparked fury against Chamberlain from the open-source community, many threads started to pop up on the internet asking and searching for alternatives for MyQ.
It was then that a brilliant man appeared with a solution. Mr. Paul Wieland saved the open-source community with his ingenious invention RATGDO (Rage Against Garage Door Opener), It has proven to be very effective for use with garage doors using security + 2.0 and can be integrated with Home Assistant. Bingo!
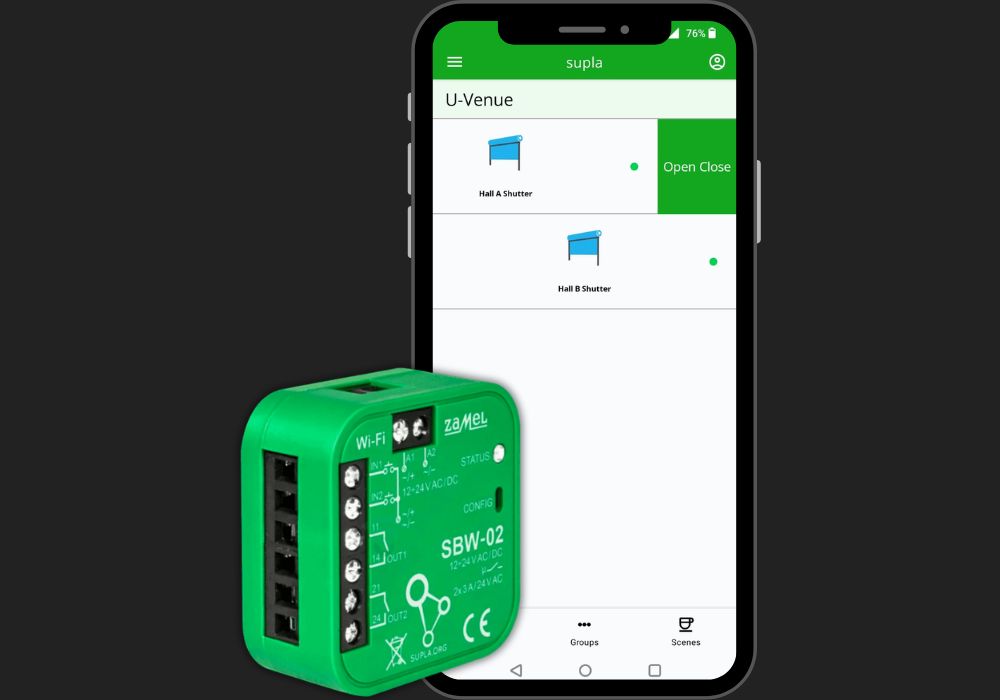
But unfortunately, RATGDO isn’t deliverable to my region. So, I kept looking for gateways for GRIFCO shutters, and finally, a few days ago, my search ended with another solution from the company supla. Supla has a mobile application for different platforms and a cloud platform service, which is open and free of charge and can be linked to Home Assistant.
So in this article, I will describe how to integrate supla shutter controller into Home Assistant.
But If you are curious to know about RATGDO please refer to this link.
With that said, let's begin . .
First add the controllers to the Supla application, which is very straight forward and easy. Follow this link to learn how. As of version 2.3.26, SUPLA offers native integration with MQTT Broker, along with support for Home Assistant MQTT Discovery, allowing automatic device discovery.
You can either use the MQTT broker built into the Supla cloud platform or the MQTT broker within the Home Assistant.
Option 1 :
Let's explain first how to integrate the supla MQTT broker with HA.
- Create an account in cloud.supla.org and login to your account
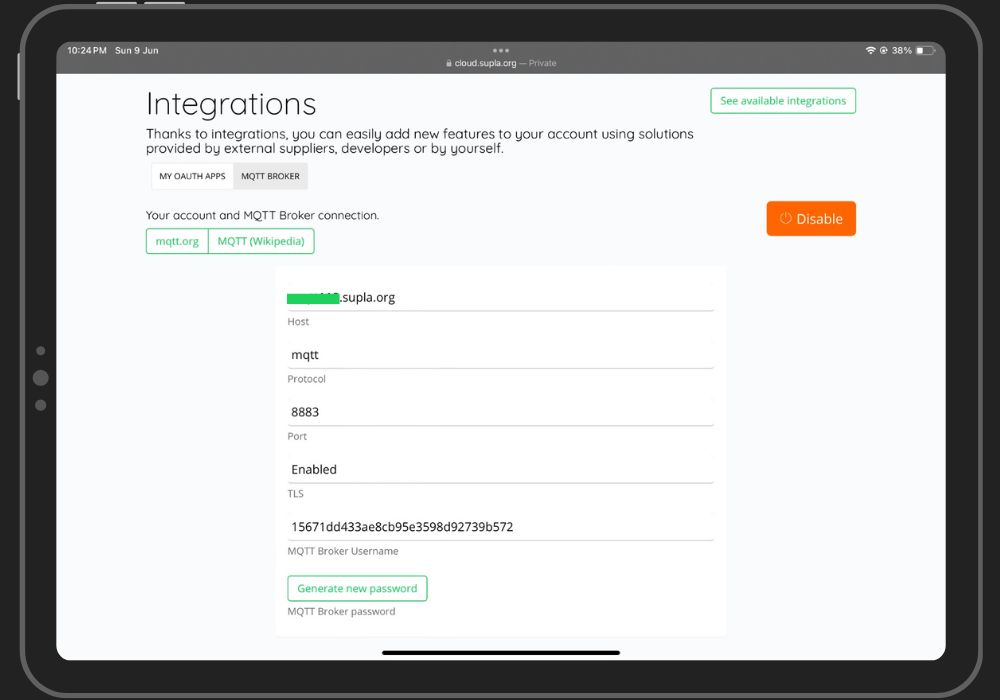
- Go to Account->Integrations and enable the MQTT broker
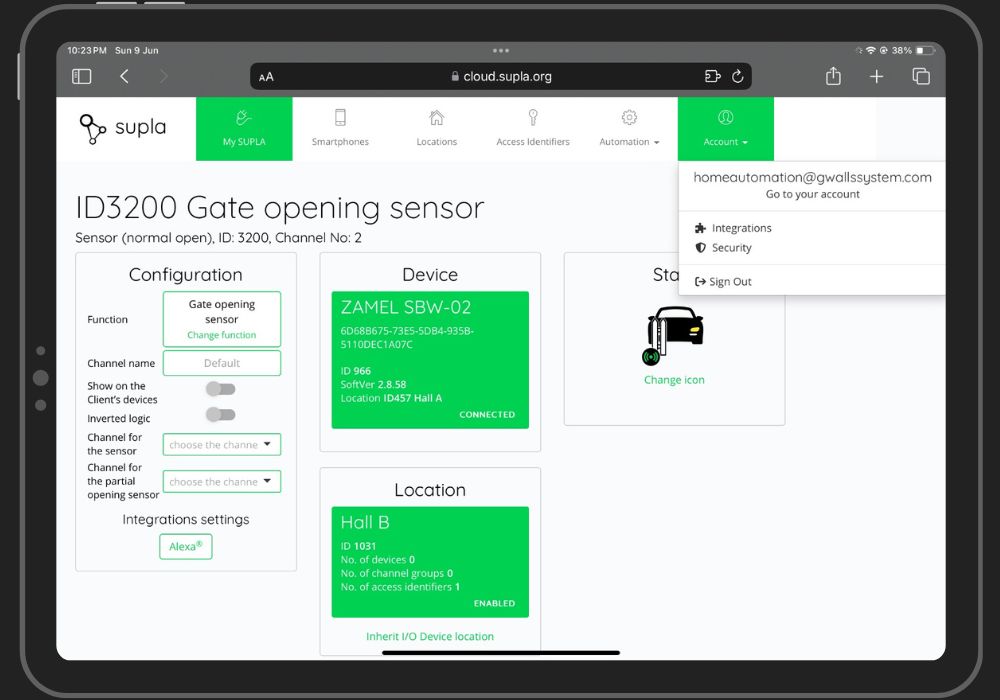
- Once you enable the MQTT, you will get the broker details, which we need later to fill into the HA MQTT integration.
(Note: Save the MQTT broker password somewhere safe as we need it later)
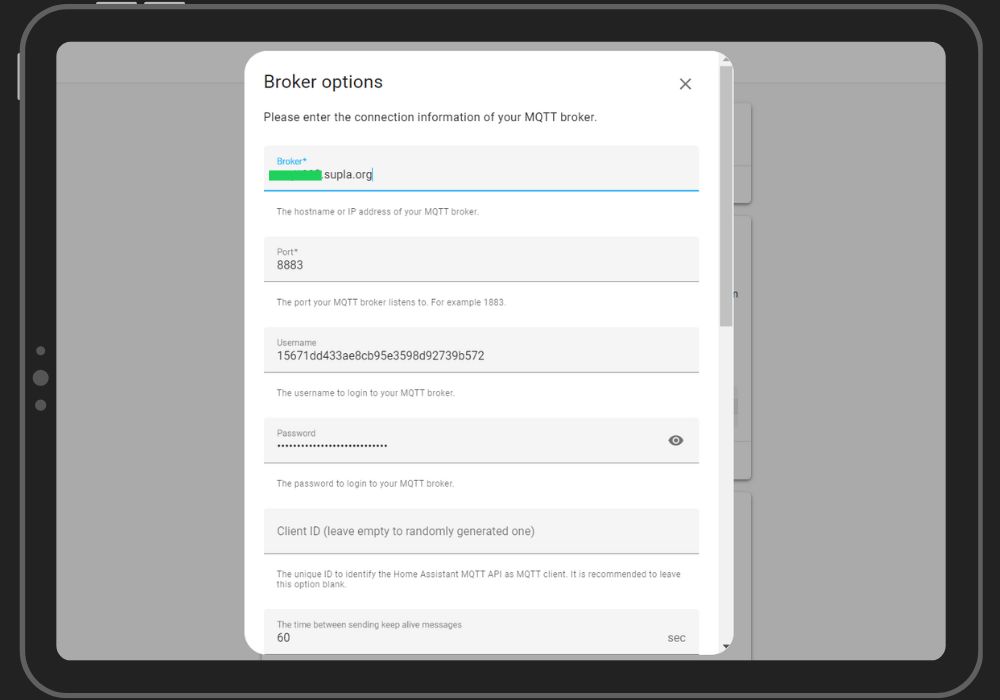
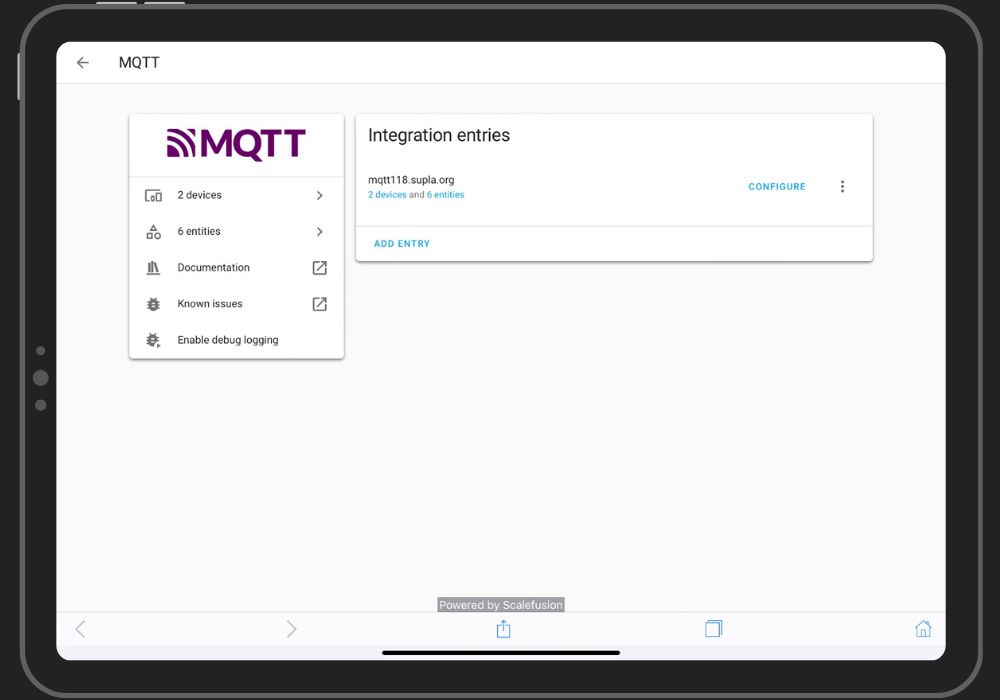
- Now that we enabled the supla MQTT broker we shall go into the HA integrations page and install MQTT from there.
(**Make sure you have enabled "Advanced Mode" on your HA profile, without Advanced Mode, you will not be able to change Advanced Settings later in MQTT Settings.)

- Install and complete the MQTT configuration with broker details obtained from supla cloud platform.
- Select “Advanced Options” and click “Submit”.
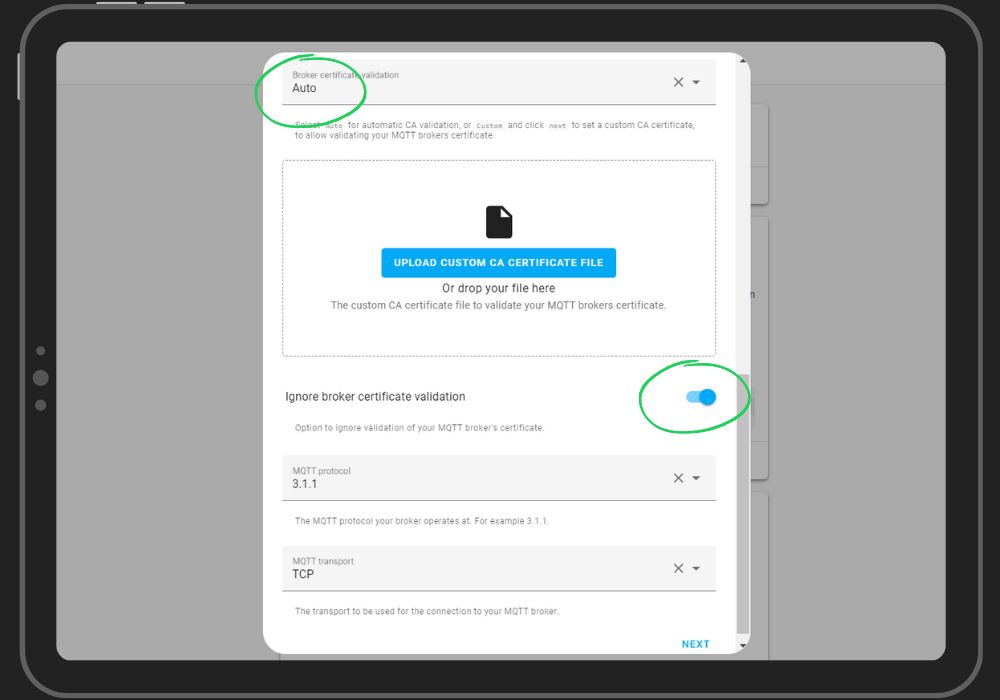
- In the advanced options, change “Checking the broker certificate” to “Automatic”.
- Select "Ignore broker certificate validation".
- Click “NEXT”.
After saving the settings, Home Assistant should immediately connect to the MQTT Supla broker and download the list of available devices from supla cloud.
Option 2 :
If you have already an MQTT broker running inside your Home Assistant, then combine your own MQTT Broker (Mosquitto) with a broker provided by supla cloud platform.
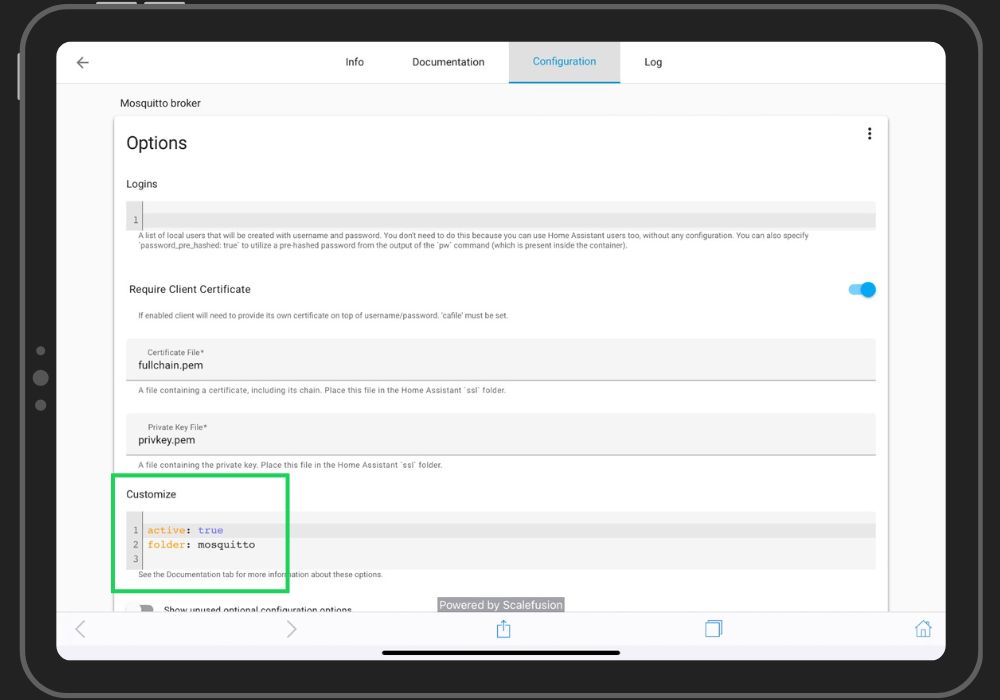
- Log in to Home Assistant and open the Mosquitto broker setup (Settings → Add-ons → Mosquitto broker).
- Add the following lines to the "Customize" section of the Mosquitto broker configuration.
                active: true

                folder: mosquitto
- Go to the "/share/mosquitto" folder inside your HA.
(If the folder does not exist, create it with the command: mkdir -p/share/mosquitto via the "Terminal & SSH" addon or you can use the native file editor add-on of HA to create the folder.)
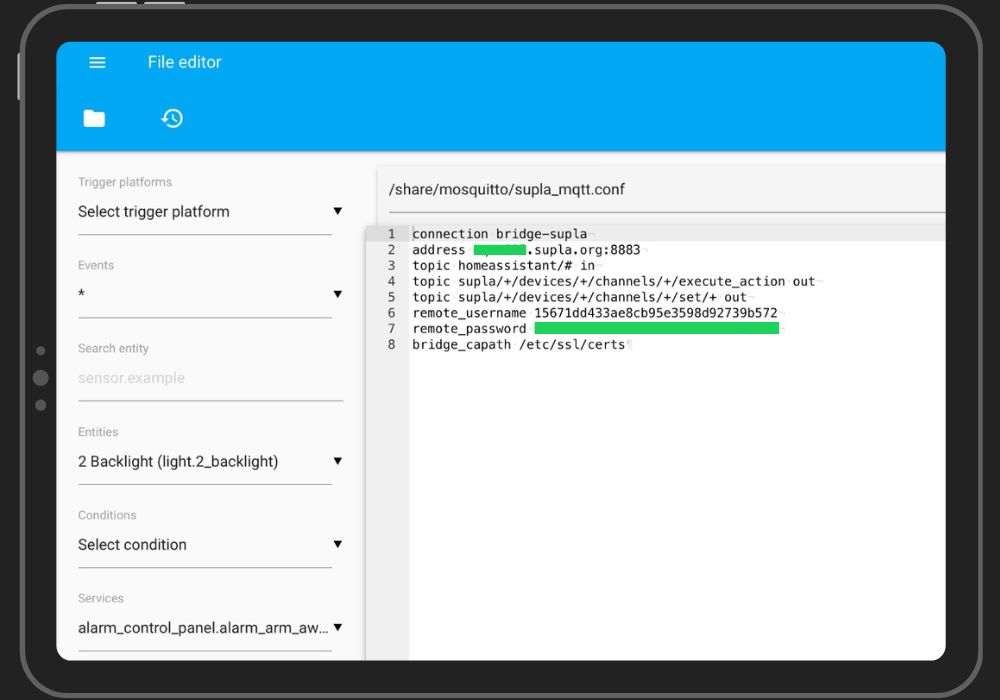
- Once you are inside the folder, create a file with the name "supla_mqtt.conf". Now add the following lines into it and save the file.
(In place of address and remote_password use the correct MQTT broker details from your supla cloud account.)
                connection bridge-supla

                address mqttxx.supla.org:8883

                topic homeassistant/# in

                topic supla/+/devices/+/channels/+/execute_action out

                topic supla/+/devices/+/channels/+/set/+ out

                remote_username 15671dd433ae8cb95e3598d92739b572

                remote_password ********************

                bridge_capath /etc/ssl/certs
- Go back to your MQTT addon (Mosquitto broker) configuration, enable the "Require Certificate" option, and save the configuration.
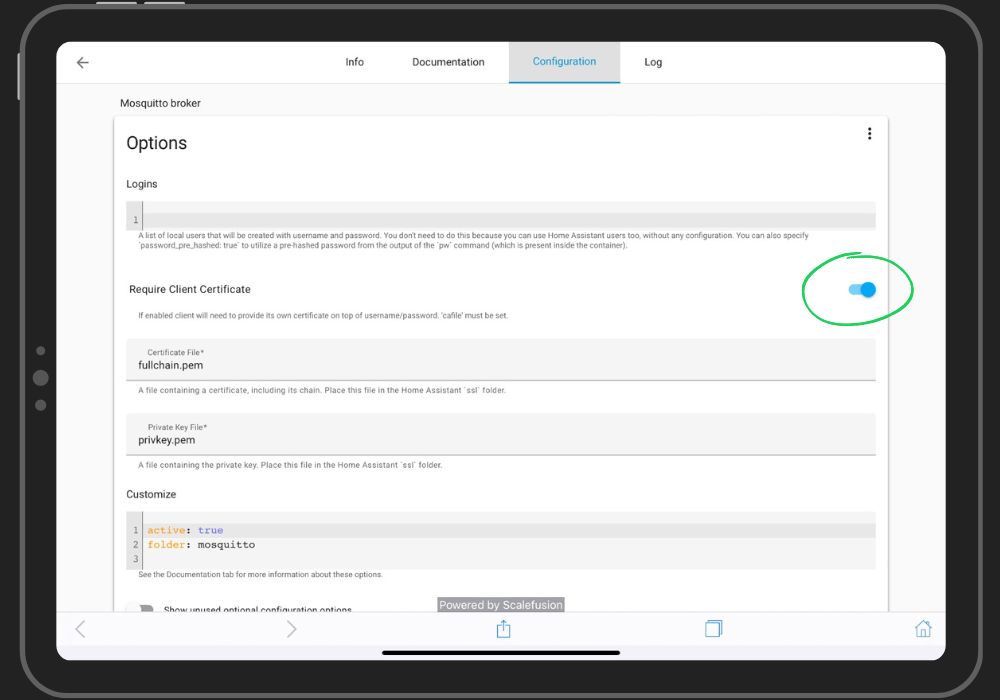
- After saving the configuration restart the MQTT broker addon.
Thank you note !
I want to personally thank you for reading my recent article.” Your time and attention are greatly appreciated, and it means a lot to me that you took the time to engage with my content. Your support and feedback are invaluable, and I am grateful for the opportunity to share my thoughts and ideas with you. Whether you left a comment, shared the article, or read it, your participation helps fuel my passion for writing and motivates me to keep creating content that resonates with readers like you.
Please feel free to reach out if you have any thoughts, questions, or feedback about the article. I love hearing from my readers and learning about your perspectives.
Once again, thank you for your support. I look forward to sharing more with you soon.